This past weekend I took an Advanced Digital Photography class with some friends from town (my bowling partner Peter, Michelle and Liane — actually we all did playgroup together, that’s how we met).
Would I recommend this to anyone who wants to kick it up a notch? Yes, for sure. It wasn’t necessarily the nitty gritty of the taking pictures, although there was plenty of information given and learned, but in this case, it was like taking a mini-Photoshop class within the photography class. I learned a few tricks, mainly the illusive MASKS and how to use them to perk up your photographs.
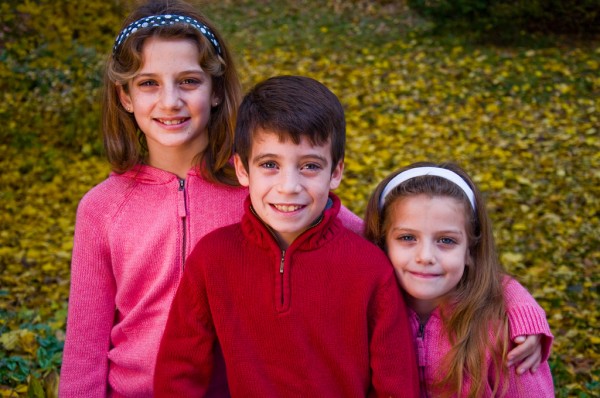
I’ve been using Photoshop for a good ten years now, mainly to create composites that I make websites out of. So, I’m familiar with a lot of techniques to get knockouts, silhouettes, etc. What I didn’t know was some of the more advanced techniques. For example, this is one of my candidates for our Christmas card this year (click for full-screen mode):
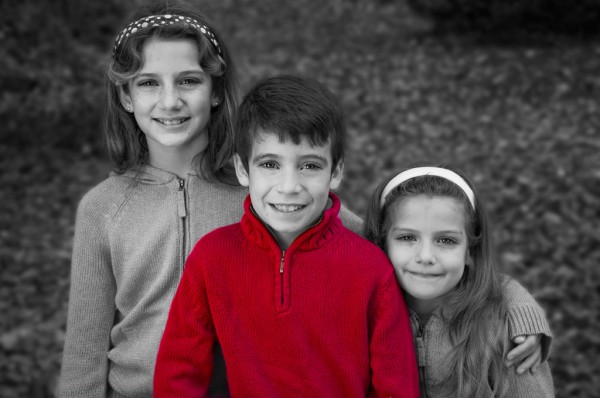
This is a neat looking picture – the one reassurance that I needed was that the pictures I’m taking are actually GOOD pictures… that much the instructor was able to reassure me. Some of my problems though, are not using the right focal length, aperture, etc. Also, he noted that I “rush” my shots, which now that I think of it, I DO! So, I have a lot of work to do training my eye and SLOWING DOWN. So, that picture was pretty good, but I changed it a bit, cleaned it up and made it more cooler (is that a word?):
Now, we’re getting closer to what you’d see from those fancy-schmancy photographers. Let me tell you what I did:
- I made a copy of the original layer (Command-J one of those things I learned), then proceeded to De-Saturate that level. Then, I added a Layer Mask to that level and made the level color BLACK (which “turns off” whatever effect applied to that layer. Then, change to a paint brush, change the foreground color to WHITE and then paint the effect back on. Actually, in this case, the opposite was true, since BLACK removes the effect and WHITE reveals the effect (or was it the opposite?, I’m still on the curve on this one).
- Once I made everything black and white except James’ sweater, I moved on to the background. I created another Layer using the previous layer (perhaps the wrong way to do that, but it worked). I applied a Gaussian Blur to the photo, created a layer mask, blacked out the mask then painted on the white to reveal the Blur. I put the blur all around the outside of the kids.
- Now, I made a sharpen layer (same steps as the previous effect) and used that to sharpen the kids eyes.
- Finally, I created a layer to take away some of the black rings around their eyes. All three kids have them, my sister-in-law tells me it might be from allergies, but I’ve yet to figure out WHAT they are allergic to (perhaps it’s me :P).
- One last thing, there was an annoying glare in James’ eye that I cleaned out.
I think that’ll be the final, until I print it out and see if it’s too dark, light, etc.
I took 200+ pictures, I’ve whittled them down a bit and you can view them by visiting my gallery and clicking on Digital Photography Class Shoot. They aren’t all of my subjects, some were of Peter’s and Cassy’s families (and they came out pretty cool too). Frank Siteman (the photographer) let me use his f2.8 300mm lens at the beginning of the shoot – WHOA! I need one of those!!! What a cool lens and the shots were unbelievable. My problem was that I’ve completely forgotten how to use a manual focus lens, so many shots were blurry :(, but I did manage to get a few really good ones. Anybody have a spare $5000 they can give me??
Sooo, next time, Cuz, you gotta come with us – I’m not sure you would have benefitted from the Photoshop stuff (but perhaps you would have), but you would have had tons of fun and learned alot about taking pictures.


Hey cuz, your pics were spectacular. And your kids are so darn cute I can’t stand it. I almost don’t even recognize Elizabeth these days. Scary!! Looks like you had a great time. And after seeing the cameras everyone had, there’s no way I’d ever go to a workshop like that. I would be totally intimidated. And you’re right . . . I bet I already know all the Photoshop stuff you learned. Oh speaking of that, the next Photoshop World is in Boston in March. I will probably go. You wanna go too?
Oooh, I’d love to go but $$$’s might be the issue. I think you’d be just fine with that class, with a DSLR-ish camera, of course. I had mentioned you in the class (and Michelle as well) as saying how I wish I had your EYE – the instructor said you should probably come to the class regardless of the camera you had.
I might go to the Photoshop class for Photographers in Boston next month, we’ll see…
Oh, btw, did you see my “before and after” section of my gallery?